
There are a number of reasons why you would want to use some sort of messaging mechanism to process incoming requests to your APIs, these include:
- Scalability/Potential performance benefits as the application/process processing messages can be scaled independently of your APIs
- Resiliency, if your service were to go down, features such as dead letter queues allow for messages to be kept and processed when the service resumes
This article is going to show step by step instructions on how to achieve this using Azure API Management (APIM) and Azure Service Bus. Steps 1-5 can be skipped if you already have an instance of APIM and Azure Service Bus.
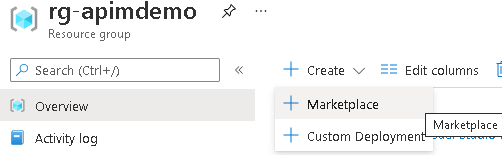
- Within Azure, provision APIM by clicking “Create”, followed by clicking the “Marketplace” option within your chosen Resource Group:
- Search for API Management, selecting the first option that appears followed by clicking the “Create” button
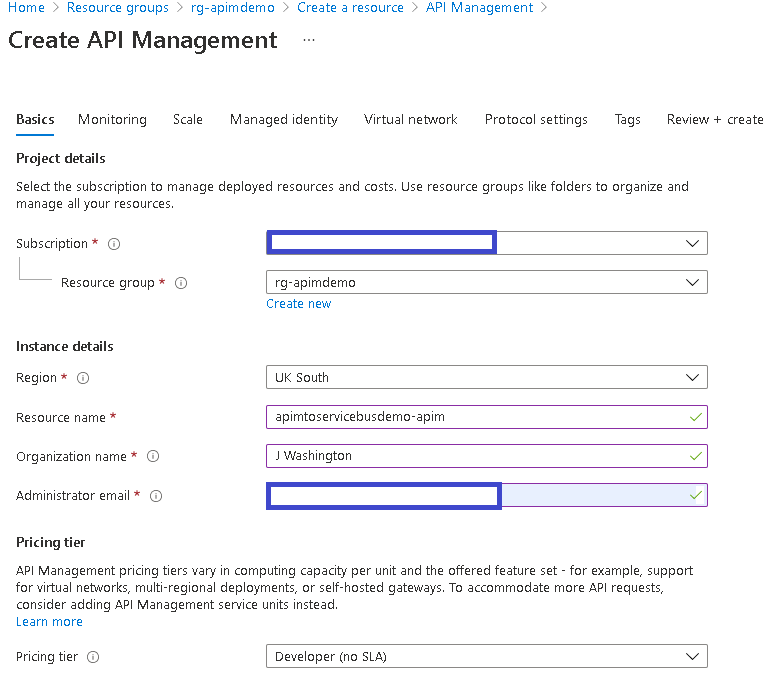
- On the window that opens, select the subscription, resource group and region that you would like APIM to be deployed to. Add a resource name, organization name, administrators email, and select the appropriate pricing tier for your solution:
- For this demo we will not be updating the settings for the other screens, feel free to update these per your own requirements. Finally click Review + create, once the validation has completed, click the create button. APIM can take several minutes to complete. Whilst waiting, we can proceed with provisioning the infrastructure required for Azure Service Bus.
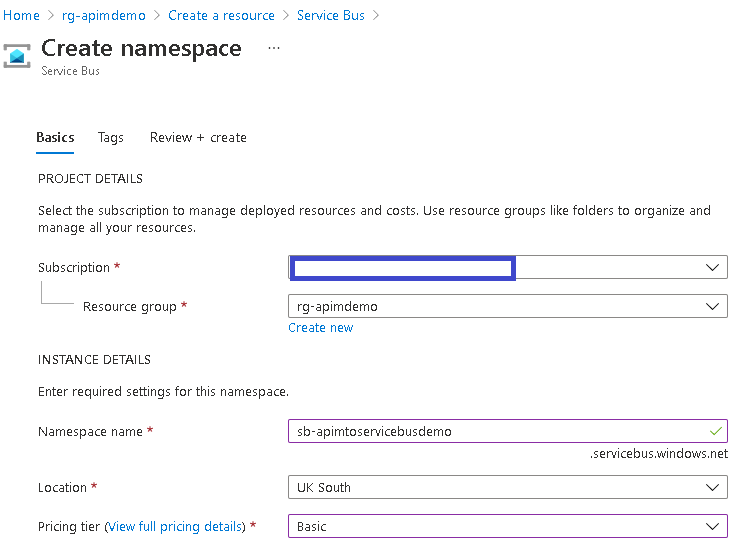
- Repeat steps 1-2, searching for “Service Bus” as the service you would like to use. On the screen that appears, fill in the details on the Basics tab similar to the below, followed by clicking Review + create, and then clicking Create once the validation has been completed:
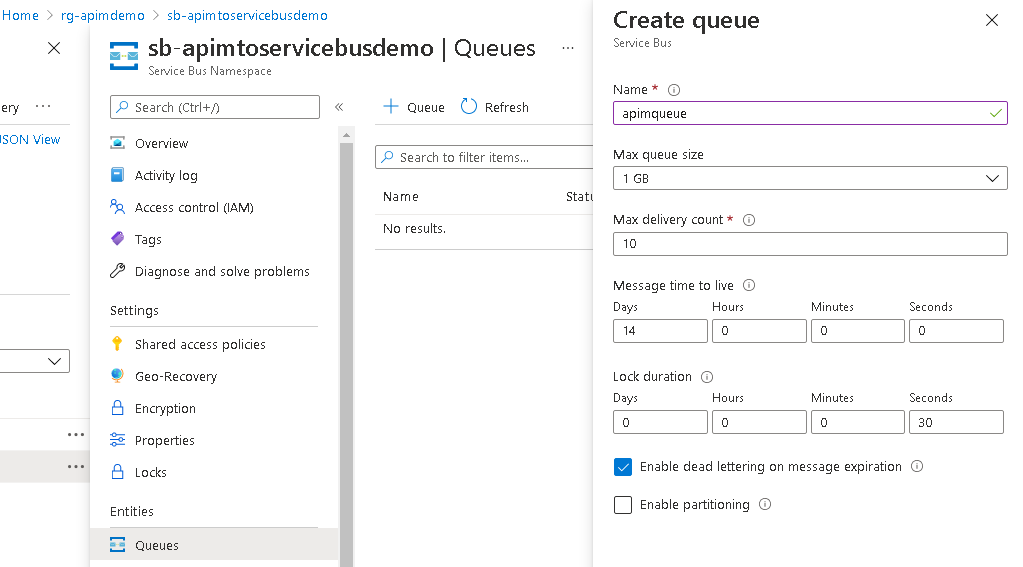
- Wait for both services to provision. When completed, navigate to the Service Bus and create a queue. This queue will be populated from APIM.
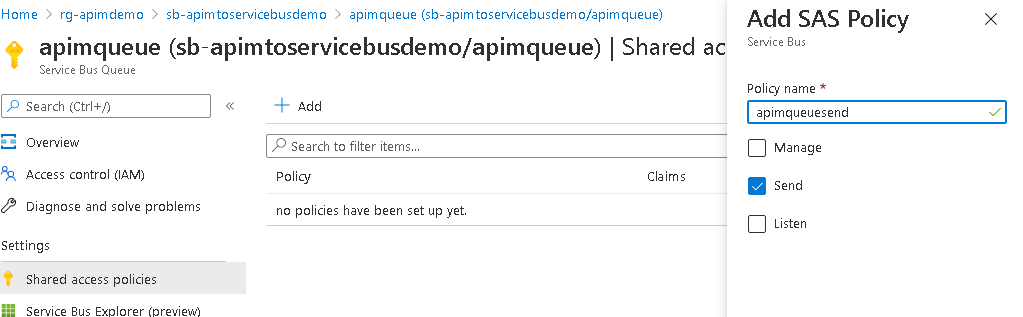
- After the queue has been created, click the queue and navigate to the shared access policy. Create a Send only policy similar to the screenshot below:
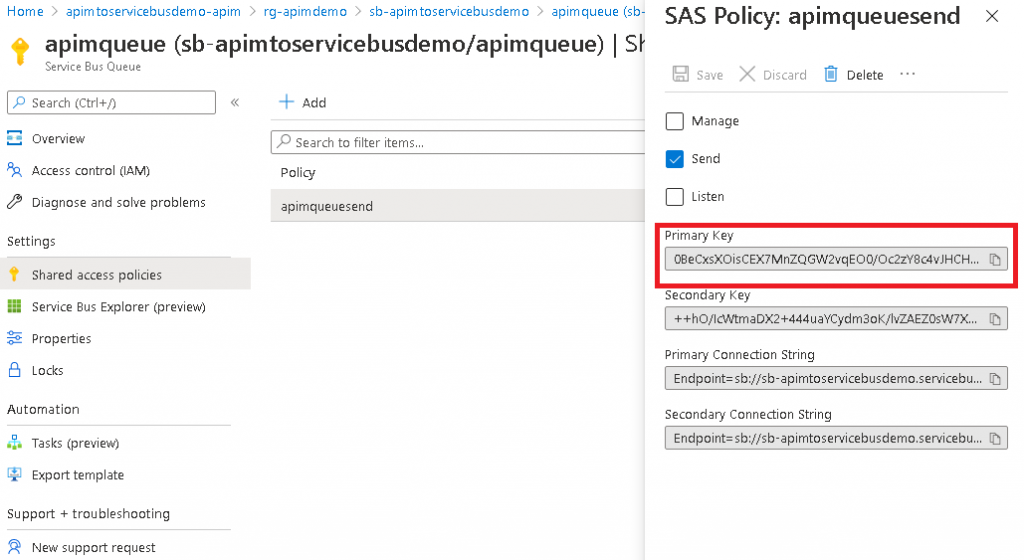
- After the shared access policy has been created, click it and make note of the primary key, not the primary connection string.
- To be able to call Azure Service Bus over http(s), a shared access signature token needs to be generated as described here. The below code shows how to do this using Powershell, please ensure you replace all variables before executing (Note this token expires, therefore you will need an automated way of updating this if used in production):
- Line 1 {{service-bus-name-here}} = namespace name of service bus created in step 5
- Line 1 {{queue-name-here}} = name of queue created in step 6
- Line 2 {{access-policy-name-here}} = name of SAS Policy created in step 7
- Line 3 {{access-policy-key-here}} = value of the primary key from step 8
The image below shows an example of the output when run using Windows Terminal:

If you do not follow the step above and you try and use the connection string instead of the shared access token signature, you may see the following error:
MalformedToken: The credentials contained in the authorization header are not in the WRAP format
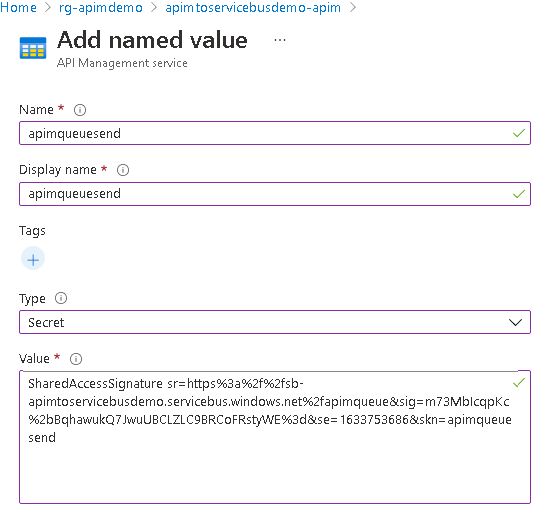
- Copy the SharedAccessSignature value from the console, this value needs to be stored as a Named value in APIM to allow APIM to post messages to the Service Bus
- Navigate to your APIM instance, and click the “Named values” menu item. This value will be referenced in the policy for the API we are going to create in APIM, allowing APIM to post to the Service Bus. Click “Add” in the menu. On the screen that appears provide a name, and display name. In the type drop down there are three options, Plain, Secret and Key Vault. Ideally Key Vault should be used (just as an FYI at the time of writing the Key Vault option is not supported in Terraform yet), in this tutorial we are going to select Secret. Input the primary connection string mentioned in Step 8 as shown below and click create:
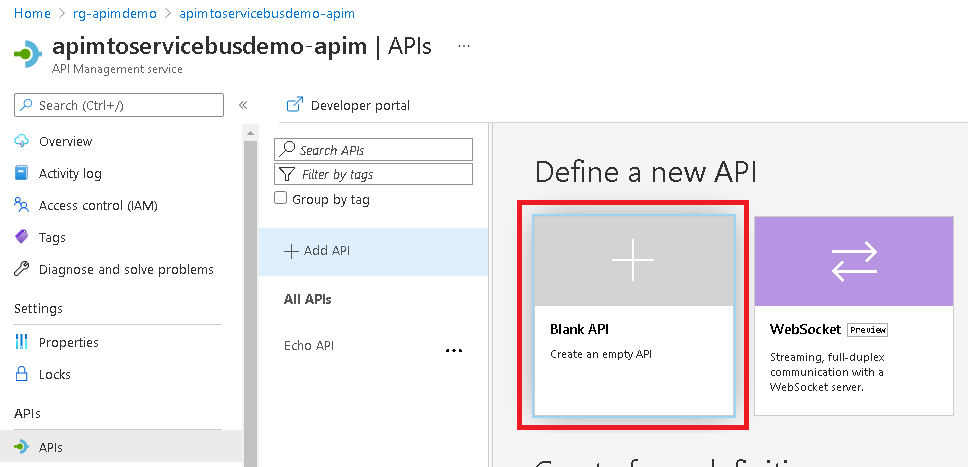
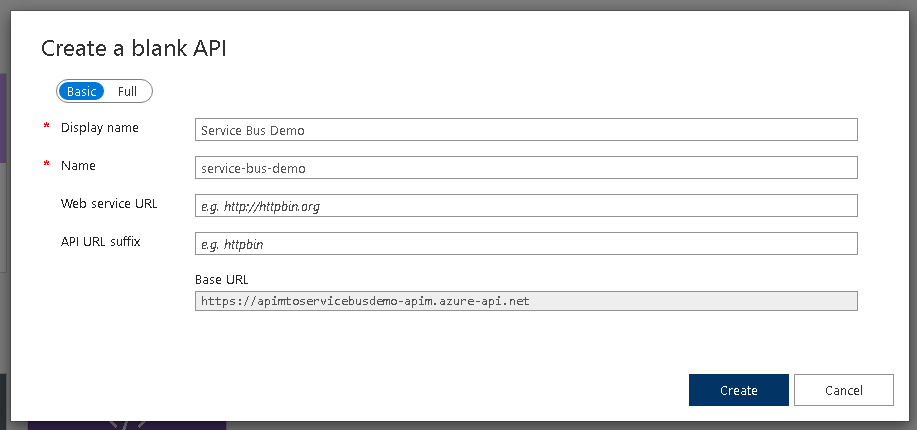
- We are now ready to create an API within APIM to post to the Service Bus. Click the “APIs” menu item, followed by clicking the “Blank API ” tile that appears:
- On the screen that appears insert a display name, a name followed by clicking “Create”:
- On the next screen that appears, click the “+ Add operation” button. Insert a display name, name, set the URL action to POST and provide a name for the endpoint as shown below. Click save:

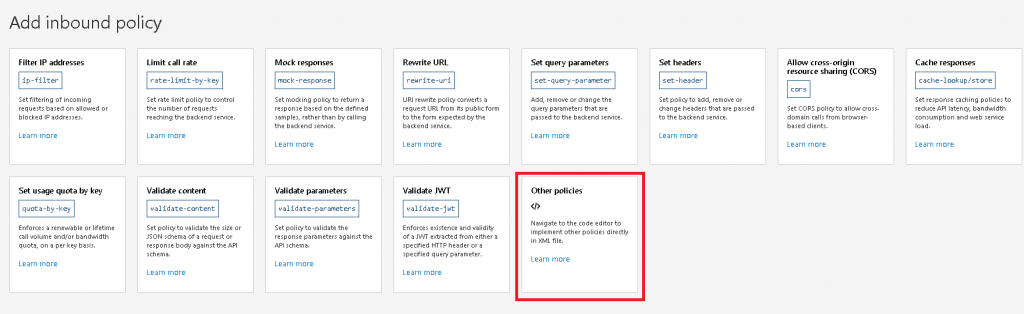
- Our API and action has now been created in APIM. If you tried to call this endpoint, you will receive a “500 Internal Server Error”. The next step is to modify the inbound policy to write to the Service Bus. Click the “+ Add policy” button in the “Inbound processing” section shown below:

- You will be presented with a number of options supported by APIM. For this demo, we would like to use a combination of these policies together, to get started quickly with the policy editor, click the “Other policies” option:
- Within the policy editor we are now going to modify the inbound policy to write to the Service Bus. Paste the below code replacing everything within the policy. Replace the below:
- the Service Bus name on line 16 created in step 5
- the Queue name on line 17 created in step 6
- the value to be used by the Authorization header on line 22. This is name of the named value created in step 10 with the additional brackets ({{}}) containing the Service Bus shared access token
| <!-- | |
| IMPORTANT: | |
| - Policy elements can appear only within the <inbound>, <outbound>, <backend> section elements. | |
| - To apply a policy to the incoming request (before it is forwarded to the backend service), place a corresponding policy element within the <inbound> section element. | |
| - To apply a policy to the outgoing response (before it is sent back to the caller), place a corresponding policy element within the <outbound> section element. | |
| - To add a policy, place the cursor at the desired insertion point and select a policy from the sidebar. | |
| - To remove a policy, delete the corresponding policy statement from the policy document. | |
| - Position the <base> element within a section element to inherit all policies from the corresponding section element in the enclosing scope. | |
| - Remove the <base> element to prevent inheriting policies from the corresponding section element in the enclosing scope. | |
| - Policies are applied in the order of their appearance, from the top down. | |
| - Comments within policy elements are not supported and may disappear. Place your comments between policy elements or at a higher level scope. | |
| --> | |
| <policies> | |
| <inbound> | |
| <base /> | |
| <set-backend-service base-url="https://sb-apimtoservicebusdemo.servicebus.windows.net" /> | |
| <rewrite-uri template="apimqueue/messages" /> | |
| <set-header name="Content-Type" exists-action="override"> | |
| <value>vnd.microsoft.servicebus.yml</value> | |
| </set-header> | |
| <set-header name="Authorization" exists-action="override"> | |
| <value>{{apimqueuesend}}</value> | |
| </set-header> | |
| <set-header name="BrokerProperties" exists-action="override"> | |
| <value>@{ | |
| var json = new JObject(); | |
| json.Add("MessageId", context.RequestId); | |
| json.Add("Label", "TestData"); | |
| return json.ToString(Newtonsoft.Json.Formatting.None); | |
| }</value> | |
| </set-header> | |
| <set-body>@{ | |
| JObject json = context.Request.Body.As<JObject>(preserveContent: true); | |
| return JsonConvert.SerializeObject(json); | |
| }</set-body> | |
| </inbound> | |
| <backend> | |
| <base /> | |
| </backend> | |
| <outbound> | |
| <base /> | |
| </outbound> | |
| <on-error> | |
| <base /> | |
| <return-response> | |
| <set-status code="200" reason="OK" /> | |
| </return-response> | |
| </on-error> | |
| </policies> |
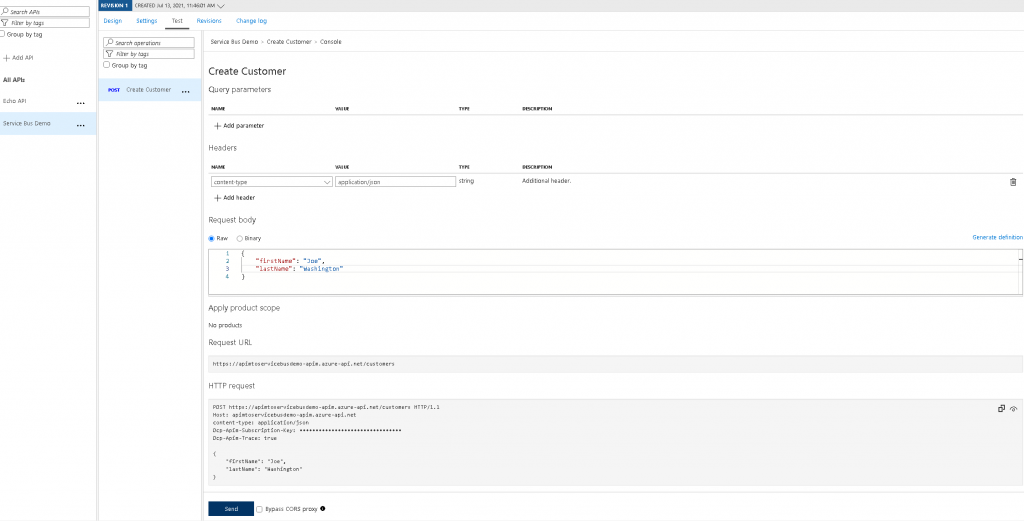
- After clicking save, we should now be able to test everything is working using the test feature within APIM. Click the “Test” tab at the top of the action we created. Add a content-type header with the value set as application/json in the Headers section, add a request body similar to { “firstName”: “Joe”, “lastName”: “Washington” } and click the send button:
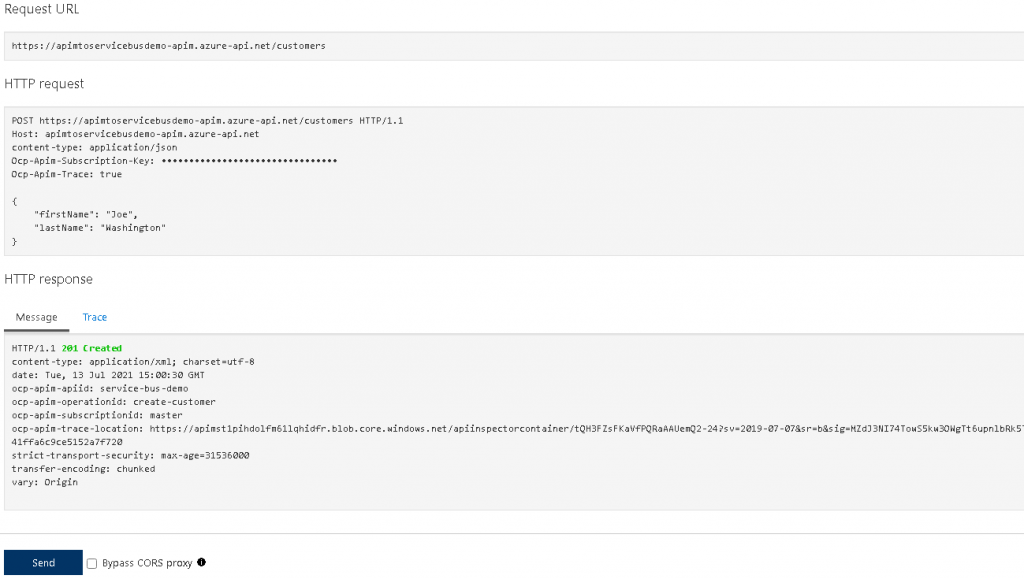
- Scroll down on the page to view the results. You should see a 201 Created message returned from the API:
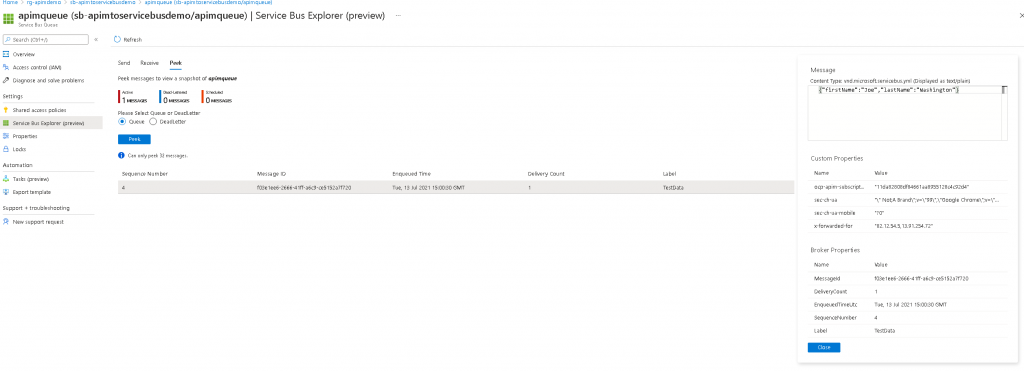
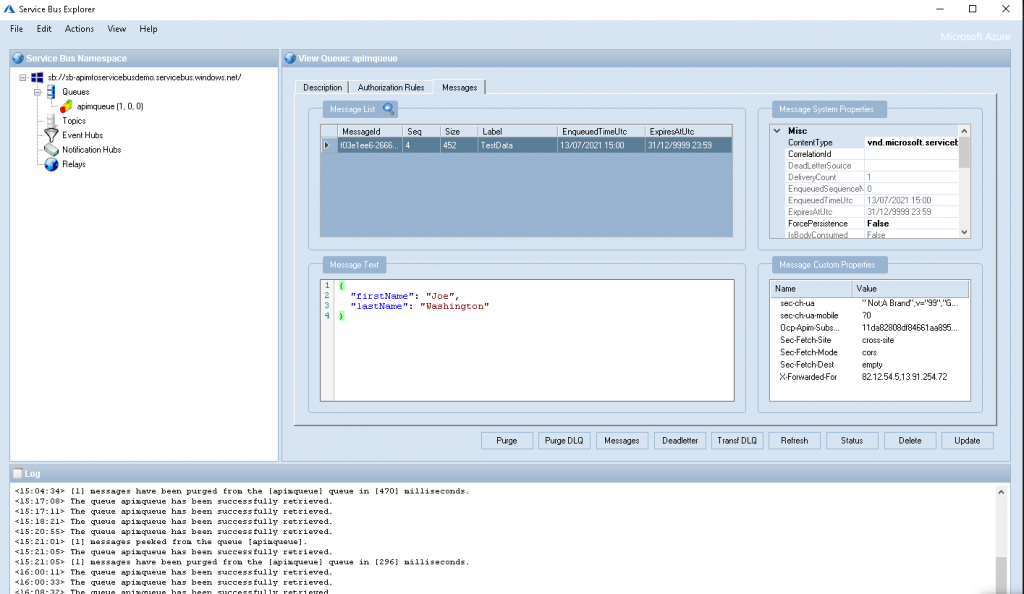
- To verify that the message has actually been posted to the Service Bus, you can use the “Service Bus Explorer (preview)” functionality in the Azure portal within the selected queue, or if you’re using Windows, you can download and use the ServiceBusExplorer tool from here.
There are more advanced things you can do with APIM policies when using Azure Service Bus, for example if a backend service is down, you may not want to lose the requests, therefore you could queue the messages and have another process like an Azure Function process these messages when the service comes back online again. See the code example below:
| <policies> | |
| <inbound> | |
| <base /> | |
| <set-backend-service base-url="https://yourapihere.com" /> | |
| </inbound> | |
| <backend> | |
| <base /> | |
| </backend> | |
| <outbound> | |
| <choose> | |
| <when condition="@(context.Response.Body.As<string>(preserveContent:true).Contains("response to check for and perform action"))"> | |
| <send-one-way-request mode="copy"> | |
| <set-url>https://{{service-bus-name}}.servicebus.windows.net/{{service-bus-queue}}/messages</set-url> | |
| <set-header name="Content-Type" exists-action="override"> | |
| <value>vnd.microsoft.servicebus.yml</value> | |
| </set-header> | |
| <set-header name="Authorization" exists-action="override"> | |
| <value>{{service-bus-shared-access-signature}}</value> | |
| </set-header> | |
| <set-header name="BrokerProperties" exists-action="override"> | |
| <value>@{ | |
| var json = new JObject(); | |
| json.Add("MessageId", context.RequestId); | |
| json.Add("Label", ""); | |
| return json.ToString(Newtonsoft.Json.Formatting.None); | |
| }</value> | |
| </set-header> | |
| <set-body>@{ | |
| JObject json = context.Request.Body.As<JObject>(preserveContent: true); | |
| return JsonConvert.SerializeObject(json); | |
| }</set-body> | |
| </send-one-way-request> | |
| <set-status code="201" reason="Created" /> | |
| <set-body template="liquid"> | |
| { | |
| "message": "Created" | |
| } | |
| </set-body> | |
| </when> | |
| </choose> | |
| </outbound> | |
| <on-error> | |
| <base /> | |
| <choose> | |
| <when condition="@(context.Response.StatusCode >= 400 && context.Response.StatusCode != 401)"> | |
| <send-one-way-request mode="copy"> | |
| <set-url>https://{{service-bus-name}}.servicebus.windows.net/{{service-bus-queue}}/messages</set-url> | |
| <set-header name="Content-Type" exists-action="override"> | |
| <value>vnd.microsoft.servicebus.yml</value> | |
| </set-header> | |
| <set-header name="Authorization" exists-action="override"> | |
| <value>{{service-bus-shared-access-signature}}</value> | |
| </set-header> | |
| <set-header name="BrokerProperties" exists-action="override"> | |
| <value>@{ | |
| var json = new JObject(); | |
| json.Add("MessageId", context.RequestId); | |
| json.Add("Label", ""); | |
| return json.ToString(Newtonsoft.Json.Formatting.None); | |
| }</value> | |
| </set-header> | |
| </send-one-way-request> | |
| <set-body template="liquid"> | |
| { | |
| "message": "Created" | |
| } | |
| </set-body> | |
| <set-status code="201" reason="Created" /> | |
| </when> | |
| </choose> | |
| </on-error> | |
| </policies> |
Please reach out to me on LinkedIn if you have any questions or tips on how to improve the solution