
In this post, we are going to cover using YAML with Azure DevOps for multi-stage deployments. The pipeline is going to consist of three stages for simplicity:
- Stage 1 – Build – This will build an Angular application and an ARM template project, producing the artifacts which will be used by Stage 2, and then Stage 3
- Stage 2 – Deploy to Dev – This will take the artifacts from Stage 1 and deploy the infrastructure to an Azure Dev environment followed by the Angular application
- Stage 3 – Deploy to QA – This will take the artifact from Stage 1 and deploy the infrastructure to an Azure QA environment followed by the Angular Application after Stage 2 is successful and when manually approved by a user.
Prerequisites
I have copied the code explained in this post from my Azure DevOps account to GitHub which can be found here. The pre-requisites for this post are:
- You have an Azure Subscription
- You have an Azure Service Connection configured in Azure DevOps that can deploy to your resource groups in your Azure Subscription
- You have pulled the code from the repository here and have pushed the /src directory containing the Angular site and Azure Resource Manager project into your Azure DevOps projects repo – we will be covering adding the pipelines step by step below
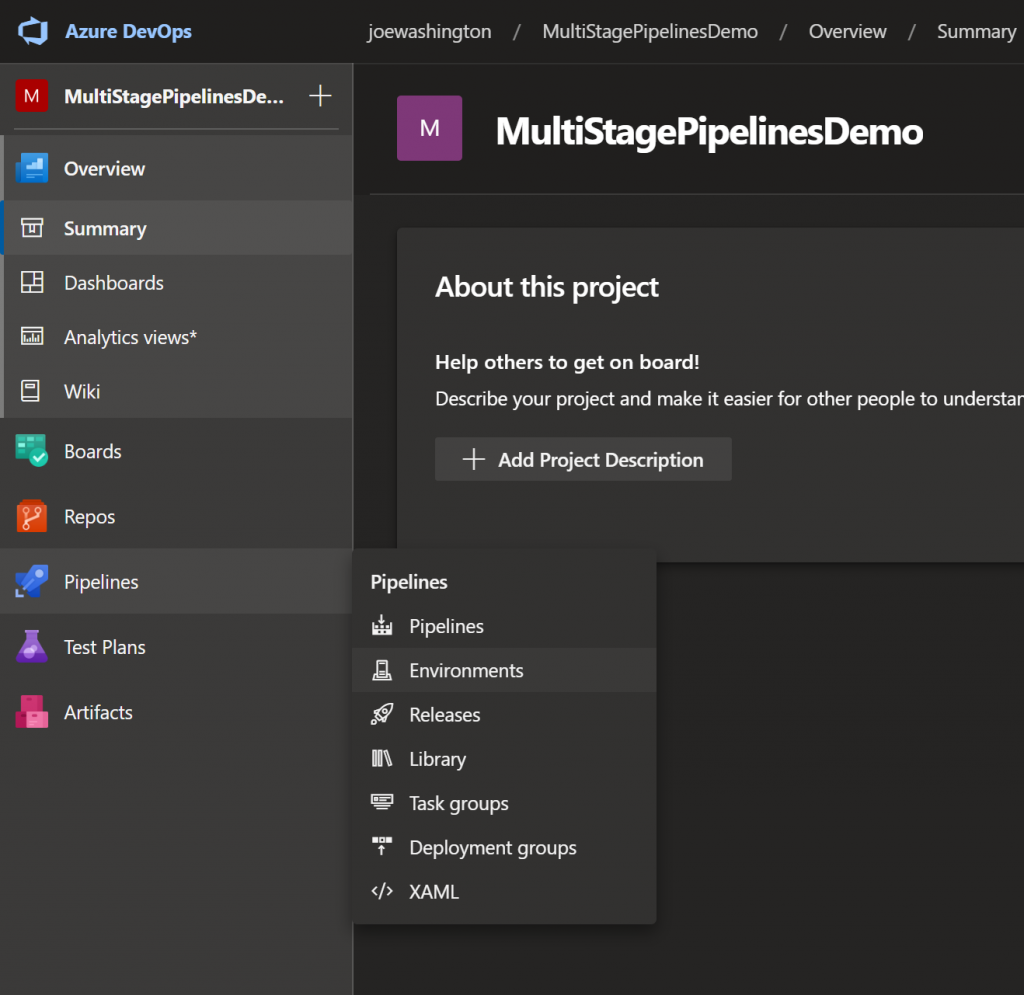
Adding environments
As mentioned above, we are going to be deploying to two environments, Dev and QA. We will start by adding these environments in Azure DevOps. Navigate to Azure DevOps, and click the Environments menu item under the Pipelines menu icon:
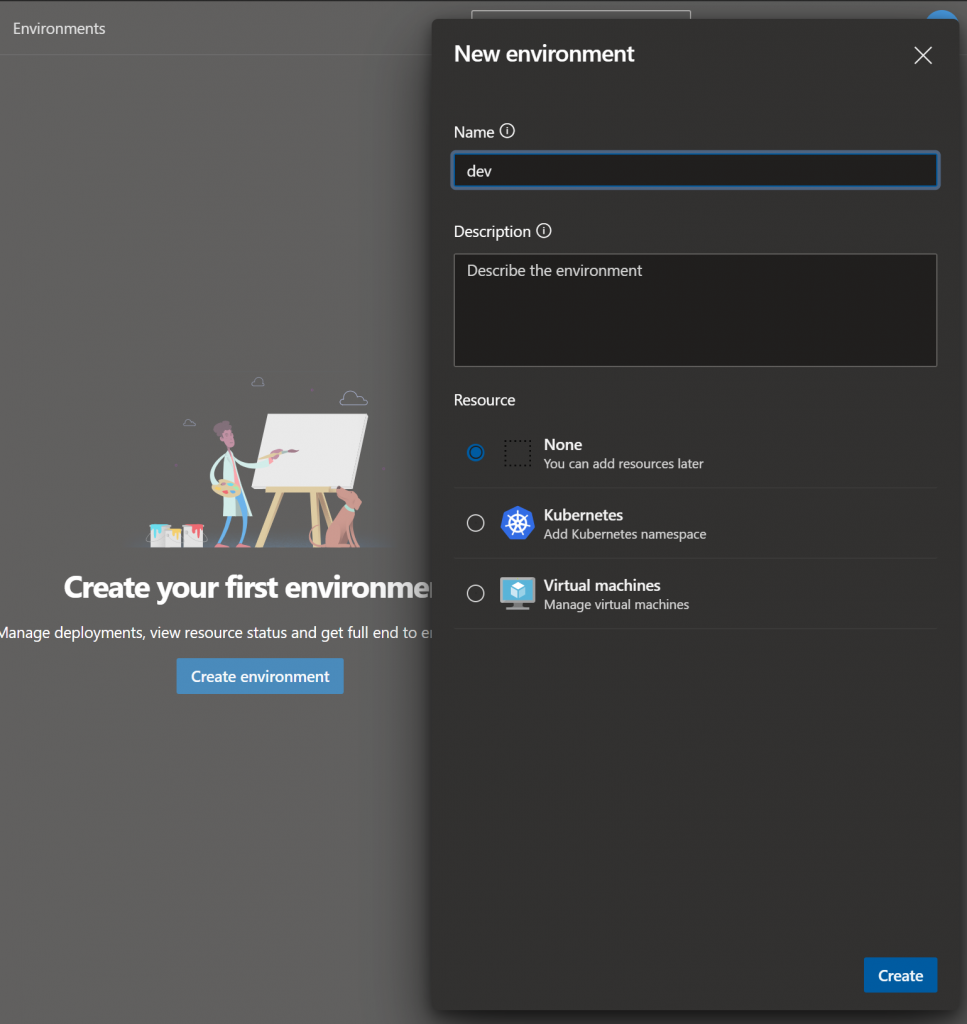
On the screen that appears click the “Create environment” button. On the modal that appears insert the name as dev as shown in the image below. Do the same for QA inserting qa as the name instead of dev:
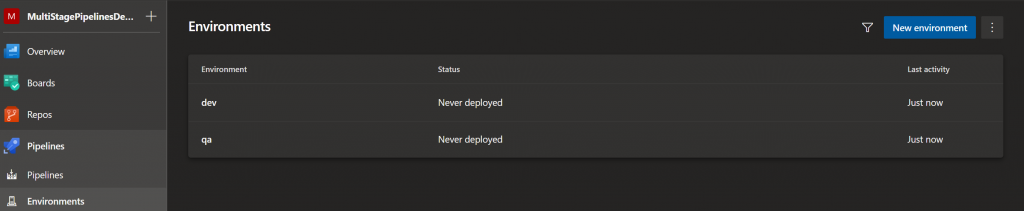
Once both environments have been created, click the Environments menu item again and you should see the below:
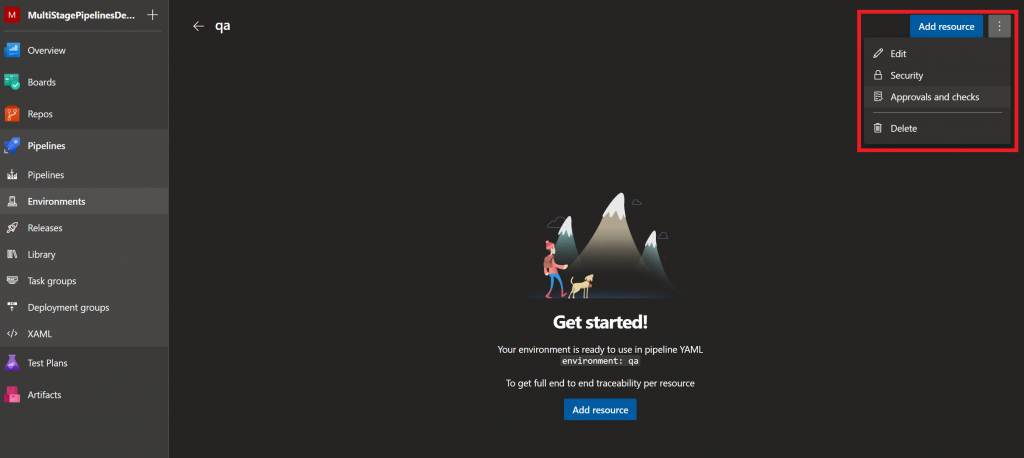
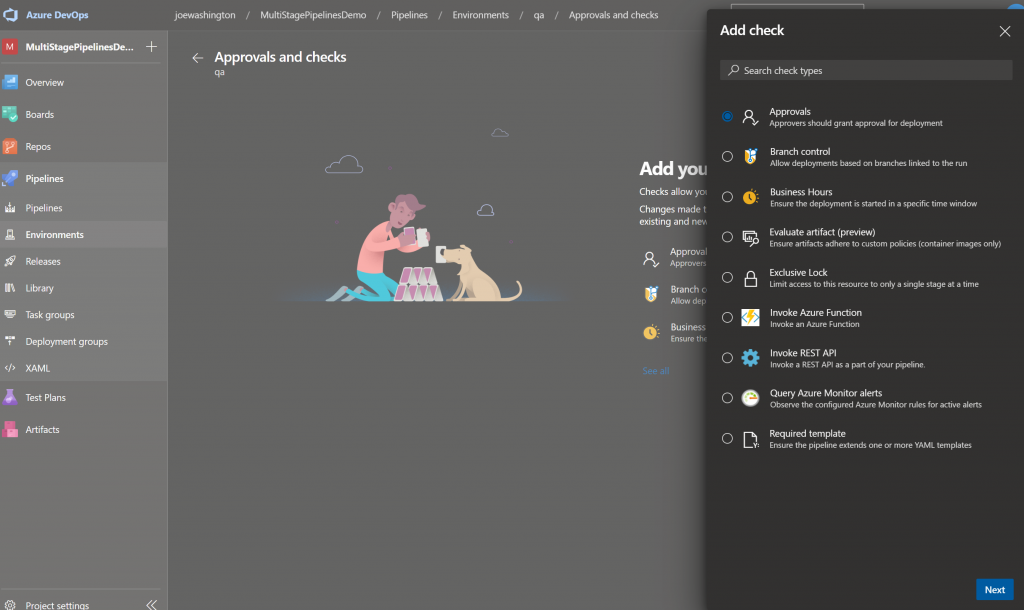
As mentioned above when describing the stages, we stated that the QA environment requires approval before the application is deployed – Clicking the qa environment will take you through to a screen where this can be configured. Click the three dots icon as highlighted below to view the “Approvals and checks” menu item:
Within this menu item there are multiple options from controlling which branches can deploy to the environment to triggering an Azure Function, we are going to select the “Approvals” menu item:
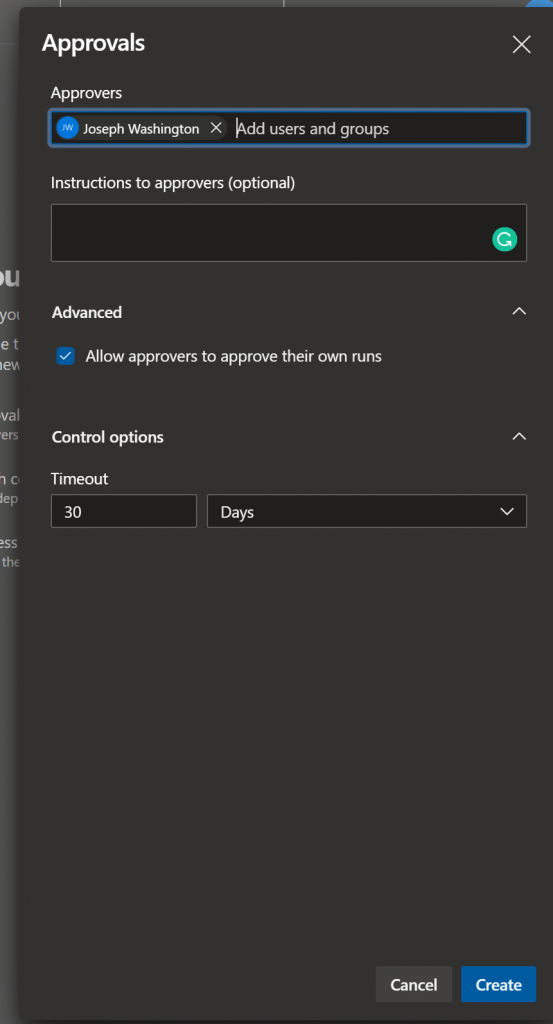
On the next screen that appears you can then configure who the approvers are. I am going to put myself in for now, however, you can add as many users as you like. When you add two or more users, extra options appear that allow you to set if all are required for approval, if one person can approve for all, and if a particular order needs to be followed.
Adding variables per Environment
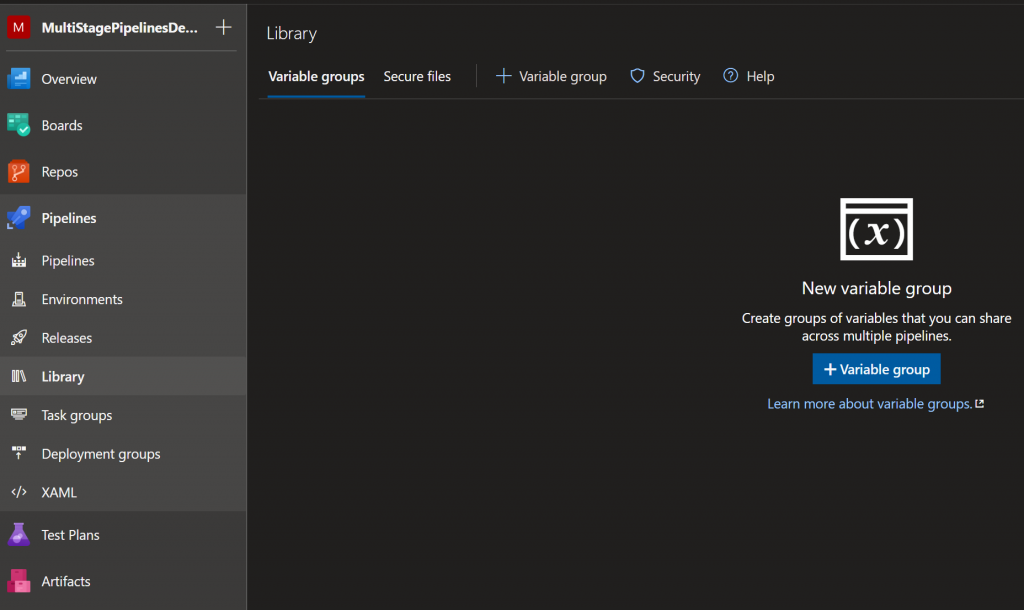
Now that we have configured the environments, the next stage is to add variable groups. Variable groups can be used to define a group of variables, and can also be configured to pull in values from Key Vault. We are then going to assign these variable groups to the different stages in our pipeline meaning the variables will be environment specific. To access variable groups, click the “Library” menu item under the “Pipelines” menu icon as shown below:
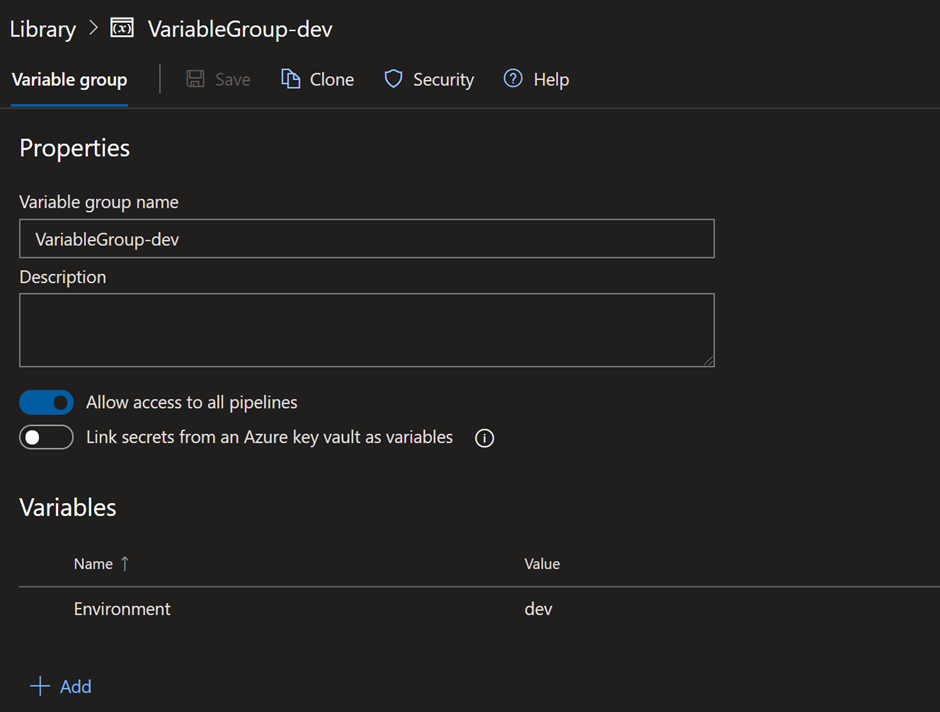
On the screen that appears, click the “+ Variable group” button. On the screen that appears, give your variable group a meaningful name. For demo purposes, I have called mine VariableGroup-dev. At the bottom of the screen is where you can add your variables. We are only going to add one variable in this demo, this is going to be Environment and the value is going to be dev. Here as mentioned above you could also link to Azure Key Vault, or add as many parameters including secret parameters as you like. Click save once complete. Please see the screenshot below:
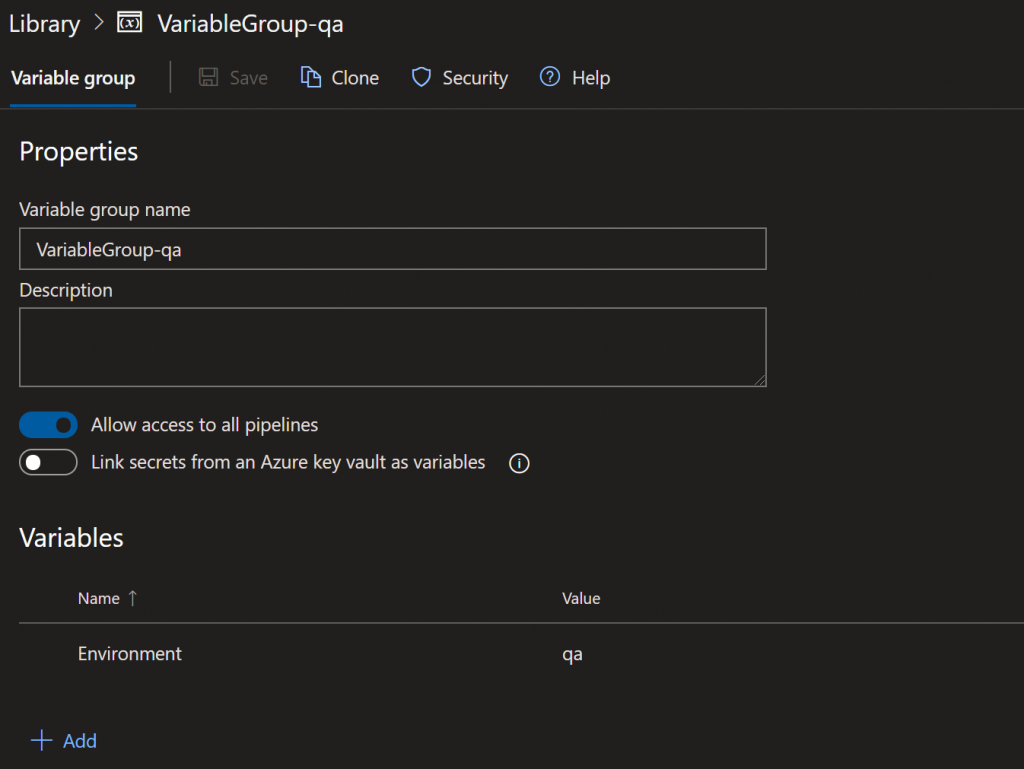
We need to do the same for the QA environment, this time setting the Environment variable to qa. Please see the below for reference:
Configuring the pipeline
In Azure DevOps click the Pipelines menu item, and click the “Create Pipeline” button in the middle of the screen. On the following screen asking where your code is select your repository location. I am going to be using the Azure Repos Git menu option for this post. Next select your codes repository, followed by the Starter pipeline menu item.
On the screen that appears remove everything after the vmImage parameter as shown below:
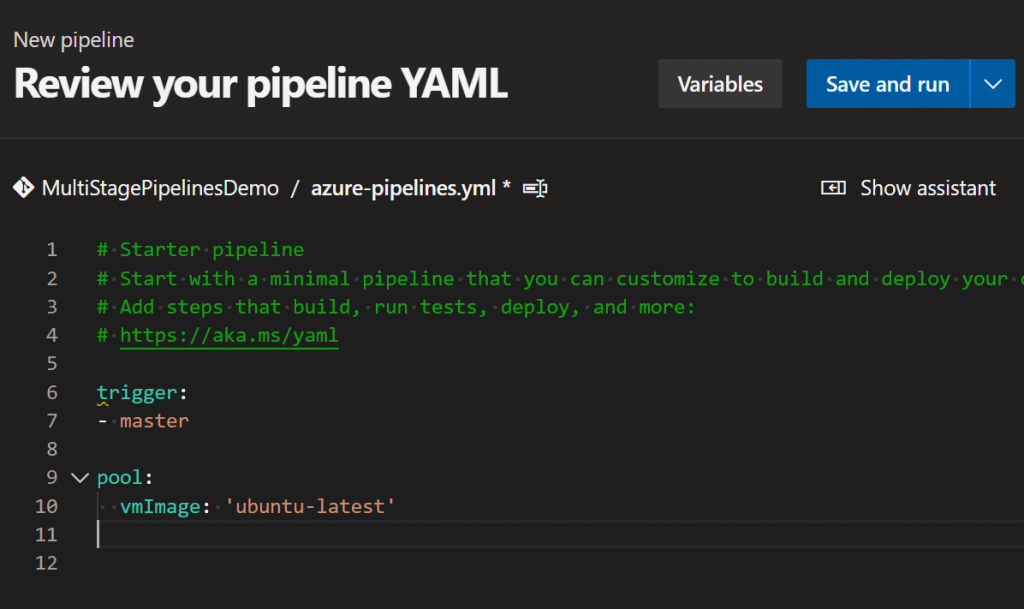
We are now going to add the first stage – building the solution and producing the artifacts. Within this first stage we are going to add two jobs, one to build the Angular project, produce the dist folder and publish the artifact to be used for deploying, and the second for publishing the artifact containing the ARM template. We are using two jobs in this stage so that we can run them both in parallel. Copy the below code in to pipeline YAML file:
| # Starter pipeline | |
| # Start with a minimal pipeline that you can customize to build and deploy your code. | |
| # Add steps that build, run tests, deploy, and more: | |
| # https://aka.ms/yaml | |
| trigger: | |
| - master | |
| pool: | |
| vmImage: 'ubuntu-latest' | |
| stages: | |
| - stage: Build | |
| displayName: Build Angular App and publish artifacts | |
| jobs: | |
| - job: BuildAngularApp | |
| displayName: Build Angular App | |
| steps: | |
| - task: NodeTool@0 | |
| inputs: | |
| versionSpec: '10.x' | |
| displayName: 'Install Node.js' | |
| - script: | | |
| npm install -g @angular/cli | |
| displayName: 'Install the angular cli globally' | |
| - task: Npm@1 | |
| inputs: | |
| command: 'install' | |
| workingDir: 'src/multistage-pipeline-demo' | |
| displayName: 'Install angular app packages' | |
| - task: Npm@1 | |
| displayName: 'Build Angular application' | |
| inputs: | |
| command: custom | |
| customCommand: run build -- --prod | |
| workingDir: src/multistage-pipeline-demo | |
| - task: ArchiveFiles@2 | |
| displayName: Zip Angular dist folder | |
| inputs: | |
| rootFolderOrFile: 'src/multistage-pipeline-demo/dist/multistage-pipeline-demo' | |
| includeRootFolder: false | |
| archiveType: 'zip' | |
| archiveFile: '$(Build.ArtifactStagingDirectory)/multistage-pipeline-demo.zip' | |
| replaceExistingArchive: true | |
| - task: PublishBuildArtifacts@1 | |
| displayName: Publish Angular app dist folder artifact | |
| inputs: | |
| PathtoPublish: '$(Build.ArtifactStagingDirectory)/multistage-pipeline-demo.zip' | |
| ArtifactName: 'angular-app' | |
| publishLocation: 'Container' | |
| - job: PublishARMArtifacts | |
| displayName: Publish ARM artifact | |
| steps: | |
| - task: PublishBuildArtifacts@1 | |
| inputs: | |
| PathtoPublish: 'src/MultiStagePipeline/AzureResourceGroup.Infrastructure' | |
| ArtifactName: 'arm-template' | |
| publishLocation: 'Container' |
Now that we have our artifacts, we are going to create the next stage – Deploy to Dev. Within this stage, we are going to use a special type of job instead of a stage called a deployment job. Deployment jobs have a number of benefits including the ability to see end-to-end deployment history across pipelines and the status of the deployments, and it also gives you the ability to specify deployment strategies such as run once and canary builds – for more details please view this link here.
In the jobs section there are two important parameters to highlight:
- The environment parameter at line 7 of the gist below – This should match what you named your dev environment. This is important as all deployment history will be recorded against the environment, and as you will see later when creating the stage to deploy to test, this is also used to determine if approvals are required
- The variables parameter at lines 8 and 9 of the gist below – This should match the variable group you created above for the dev variables. This is important as these will be the variables that are used within the jobs.
Next up we are going to add two tasks, one to deploy the ARM template and another to deploy the Angular site. Please see the gist below for reference. You will need to replace my subscription Id with yours (I have used a build variable here), replace the resource group names with the ones you have created, and replace the azure service connections. Note line 33 of the gist, the $(environment) variable is being pulled from the variable group we created earlier in the article which we specified as the variable group to use for the job.
| - stage: DeployToDev | |
| displayName: Deploy to Dev | |
| dependsOn: Build | |
| jobs: | |
| - deployment: DeployARMAndWebApp | |
| displayName: Deploy infrastructure and web app | |
| environment: 'dev' | |
| variables: | |
| - group: VariableGroup-dev | |
| strategy: | |
| runOnce: | |
| preDeploy: | |
| steps: | |
| - download: current | |
| artifact: angular-app | |
| displayName: Download Angular artifact | |
| - download: current | |
| artifact: arm-template | |
| displayName: Download ARM template artifact | |
| deploy: | |
| steps: | |
| - task: AzureResourceManagerTemplateDeployment@3 | |
| displayName: Deploy ARM Template | |
| inputs: | |
| deploymentScope: 'Resource Group' | |
| azureResourceManagerConnection: 'MultiStagePipeline-dev' | |
| subscriptionId: '38c15d6f-362a-4c30-9cd2-f1b3d8e1c38e' | |
| action: 'Create Or Update Resource Group' | |
| resourceGroupName: 'rg-multistage-pipeline-$(environment)' | |
| location: 'UK South' | |
| templateLocation: 'Linked artifact' | |
| csmFile: '$(Pipeline.Workspace)/arm-template/WebSite.json' | |
| overrideParameters: '-environment $(environment)' | |
| deploymentMode: 'Incremental' | |
| - task: AzureRmWebAppDeployment@4 | |
| displayName: Deploy Angular App | |
| inputs: | |
| ConnectionType: 'AzureRM' | |
| azureSubscription: 'MultiStagePipeline-dev' | |
| appType: 'webApp' | |
| WebAppName: 'app-multistagepipeline-$(environment)' | |
| packageForLinux: '$(Pipeline.Workspace)/angular-app/multistage-pipeline-demo.zip' |
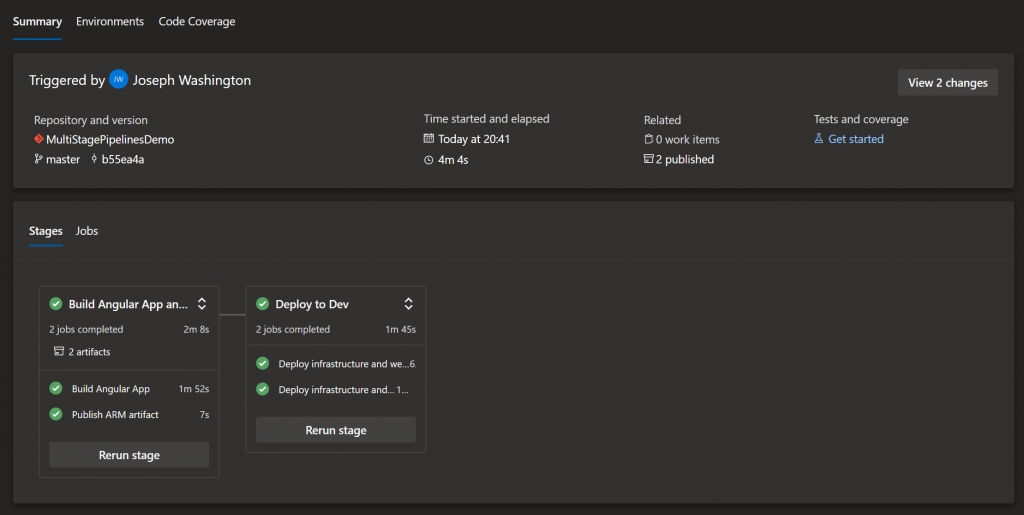
Saving the pipeline will trigger the build and the deployment to the dev environment. Once complete you should see the screen below showing:
- The build stage completed and produced 2 artifacts
- The deployment to Dev completed successfully deploying both the infrastructure and the Angular application
We can navigate to our Azure Subscription and see the resources created and navigate to https://app-multistagepipeline-dev.azurewebsites.net/ to view the deployed Angular app as shown below:


The final stage is deploying to QA. We are going to copy the stage we added for deploying to dev (we could use an inline-template here to adhere to DRY principles) and change a few parameters – these are highlighted with the in-line comments in the gist shown below:
| # Name changed from DeployToDev | |
| - stage: DeployToQA | |
| # Changed from Deploy to Dev | |
| displayName: Deploy to QA | |
| # Added to ensure this stage will not deploy until Dev has completed | |
| dependsOn: DeployToDev | |
| jobs: | |
| - deployment: DeployARMAndWebApp | |
| displayName: Deploy infrastructure and web app | |
| # Changed Point to the qa environment | |
| environment: 'qa' | |
| variables: | |
| # Changed to use the QA variables | |
| - group: VariableGroup-qa | |
| strategy: | |
| runOnce: | |
| preDeploy: | |
| steps: | |
| - download: current | |
| artifact: angular-app | |
| displayName: Download Angular artifact | |
| - download: current | |
| artifact: arm-template | |
| displayName: Download ARM template artifact | |
| deploy: | |
| steps: | |
| - task: AzureResourceManagerTemplateDeployment@3 | |
| displayName: Deploy ARM Template | |
| inputs: | |
| deploymentScope: 'Resource Group' | |
| # Changed to use the QA environment service connection | |
| azureResourceManagerConnection: 'MultiStagePipeline-qa' | |
| subscriptionId: '38c15d6f-362a-4c30-9cd2-f1b3d8e1c38e' | |
| action: 'Create Or Update Resource Group' | |
| resourceGroupName: 'rg-multistage-pipeline-$(environment)' | |
| location: 'UK South' | |
| templateLocation: 'Linked artifact' | |
| csmFile: '$(Pipeline.Workspace)/arm-template/WebSite.json' | |
| overrideParameters: '-environment $(environment)' | |
| deploymentMode: 'Incremental' | |
| - task: AzureRmWebAppDeployment@4 | |
| displayName: Deploy Angular App | |
| inputs: | |
| ConnectionType: 'AzureRM' | |
| # Changed to use the QA environment serivce connectio | |
| azureSubscription: 'MultiStagePipeline-qa' | |
| appType: 'webApp' | |
| WebAppName: 'app-multistagepipeline-$(environment)' | |
| packageForLinux: '$(Pipeline.Workspace)/angular-app/multistage-pipeline-demo.zip' | |
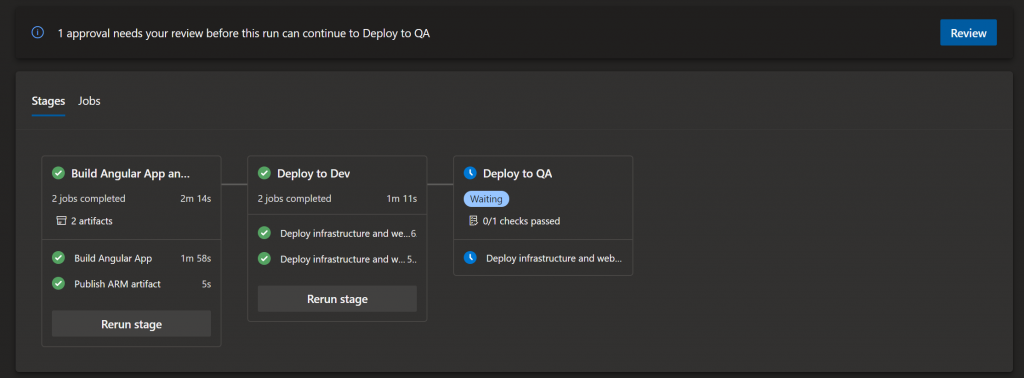
Saving the pipeline should trigger the build. Viewing the summary screen you should now see three stages with the build stage triggered as shown below:

After a few minutes the build stage and Deploy to Dev should completed, and you should see that the Deploy to QA stage is awaiting approval before deploying:

Clicking the summary line to view the detailed information shows this more clearly:
Clicking the Review button will allow you to either Approve or Reject the stage:

We are going to approve. This will continue with the deployment of the infrastructure and the Angular application. Again you can verify this by viewing the resources in the Azure Subscription, and navigating to the deployed site:


As you can see it is fairly easy to add more stages to deploy to other environments including UAT and Production, and how easy it is to have dependencies between stages. I hope this article helps those transitioning from classic releases/pipelines to using environments and YAML pipelines.